How to Make an Invoice (Step by Step, with Example)
To make an invoice, identify your business and customer, assign a unique invoice number, add the issue and due dates, describe each item or service, calculate the total, state how to pay, then review and download the finished document. You can follow the 10 steps below or open the free invoice maker and fill the fields as you read.
The example uses a fictional design studio and customer. Its prices and 5% tax entry demonstrate the arithmetic only; enter the figures, currency, tax treatment and payment terms that apply to your own agreement and location.
On this page
The finished invoice at a glance
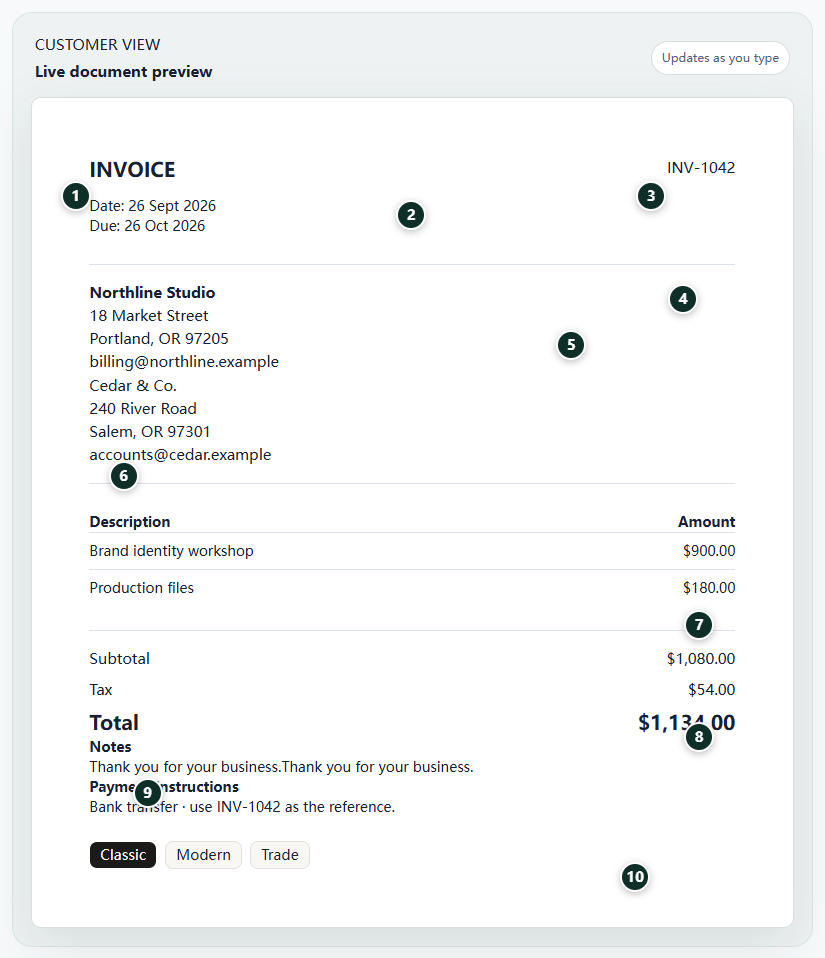
This filled example is invoice INV-1042, issued by Northline Studio to Acme Workshop. Two services total $1,080 before a user-entered $54 tax amount, producing an illustrative $1,134 total. The numbered markers correspond to the 10 steps in this guide, from choosing a method through downloading the PDF.
1. Choose how you will make the invoice
Start with the format you can complete, check and keep. A browser invoice maker is the quickest route to a polished PDF. Word or Google Docs is useful for a letter-style document; Excel or Google Sheets is useful when you want visible formulas; accounting software may suit a business that needs a wider bookkeeping workflow.
The tool does not decide what you should charge or which legal and tax fields apply. It turns the facts you enter into a document. If you want to work alongside this guide, open the free invoice maker; it requires no sign-up for the PDF workflow.
| Method | Useful when | Check before sending |
|---|---|---|
| Invoice maker | You want to fill fields and download a PDF | Names, dates, line items, total and payment instructions |
| Word or Docs | You need a flexible letter-style layout | Every placeholder is replaced and totals are correct |
| Excel or Sheets | You want formulas and reusable rows | Printed/exported layout and formula references |
| Accounting software | The invoice belongs in a larger bookkeeping process | Customer record, tax setup and account mapping |
2. Add your business details
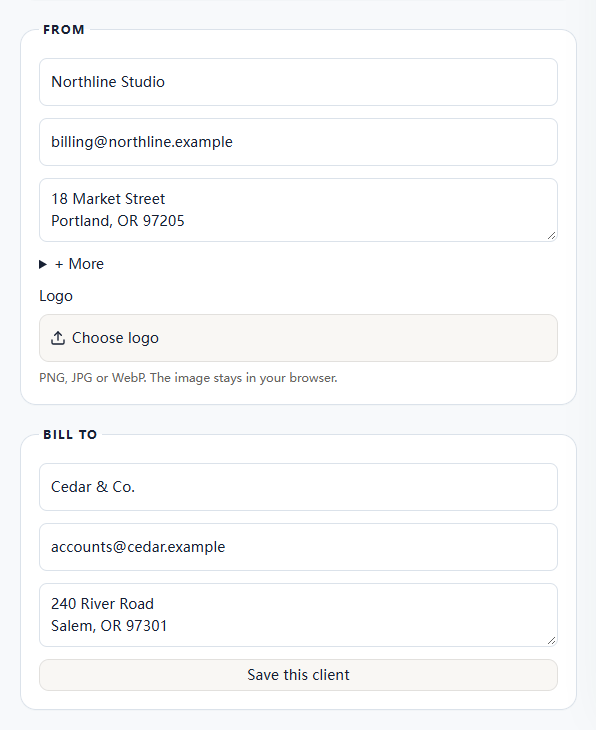
Enter the seller name that the customer knows, plus a useful address, email or phone number. Add a business or tax identifier only when it belongs on the document. A logo can help recognition, but it does not replace the legal or trading name used in your records.
Keep the details consistent with the agreement and with the account that will receive payment. In Australia, the GST Act tax-invoice rule requires enough information to identify the supplier and ABN. In the United Kingdom, the government invoice checklist includes the seller name, address and contact information. These are jurisdiction-specific source checks, not a claim that one layout is compliant everywhere.
3. Enter the customer and purchase reference
Add the customer or company name, billing address and the person or department that should review the invoice. If the customer gave you a purchase order, project code, job address or other reference, include it where they can match the charge to their records.
Check the spelling against the agreement rather than copying an informal contact name from memory. If the work took place at a different site, label the service or project address separately instead of making it look like the billing address.
4. Assign a unique invoice number
Give the invoice an identifier that is unique in your records, such as INV-1042. A simple sequence can be easier to maintain than a random number. You can add a year, client code or project prefix if the full identifier stays clear and unique.
Invosmith stores the next local invoice number in the browser you are using. It is a convenience for that browser, not a shared accounting ledger: switching devices, profiles or cleared browser data can change what is available. Check the number against your own records before you send the invoice. For a fuller numbering workflow, read the invoice number guide.
5. Set the issue date, due date and terms
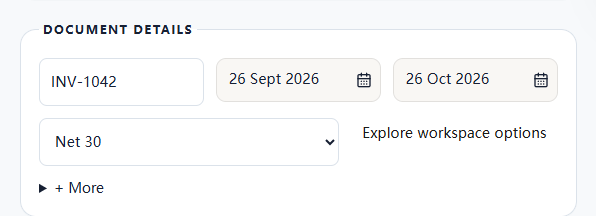
The issue date records when you created or issued the invoice. The due date tells the customer the calendar date by which payment is requested. If your agreement says “Net 14” or “due on receipt,” make the displayed date and wording agree rather than relying on the customer to calculate it.
Do not choose a payment period because it sounds standard. Use the term in the contract, quote, purchase order or accepted policy, and check any local rules that apply to your transaction. The displayed date and written term should agree.
6. Describe each service or product
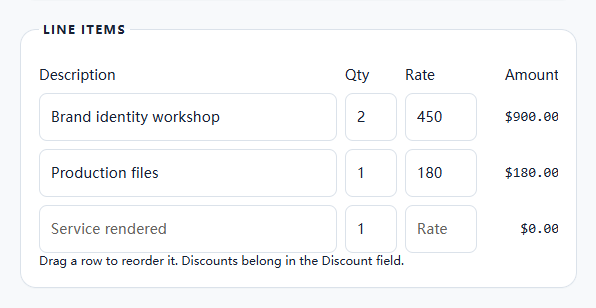
Create a separate line for each service, product, milestone or approved change that the customer needs to review. A strong description says what was supplied and may add the project, date, billing period or unit. “Brand identity workshop — 6 hours” is easier to verify than “Design work.”
Enter the quantity and rate using the unit agreed with the customer: hours, items, days, milestones or one fixed service. The line amount should equal quantity multiplied by rate. Keep supporting time records, delivery notes or approvals with your own file when the invoice alone cannot show the full evidence.
7. Add discounts, deposits and tax carefully
Apply only adjustments supported by your records. A discount should show whether it reduces one line or the subtotal. A deposit should be credited only after it was actually received, and the invoice should make the original charge, amount credited and balance due distinguishable.
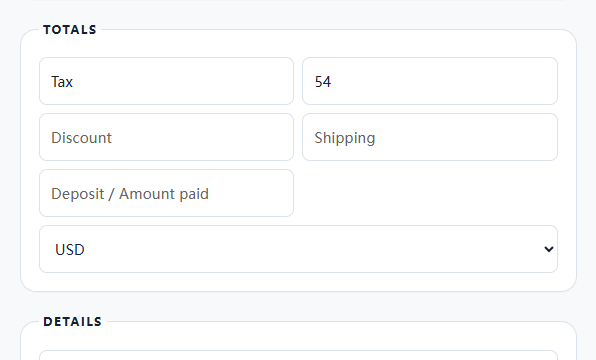
Tax is not automatic advice. In the editor you choose the tax mode and enter the amount or rate yourself; when a rate-based mode is available, only the lines you mark taxable are included in that calculation. Confirm the tax treatment, registration details and rounding that apply to your business before sending. If tax does not apply, do not add a placeholder percentage merely to make the invoice look complete.
8. Confirm the total and explain how to pay
Recalculate the line amounts, subtotal, discount, deposit credit and tax, then confirm that the final amount due follows from those figures. In the worked example, $900 + $180 = $1,080; the user-entered $54 tax amount produces a total of $1,134. These are illustrative figures, not a recommended price or tax rate.
Add payment instructions the customer can act on: for example, the bank transfer reference, cheque instructions or another method you have agreed. Invosmith creates the document; customer funds do not flow through the free invoice maker. Avoid putting passwords or unnecessary sensitive information on the invoice.
| Calculation | Worked example |
|---|---|
| Visual identity package | $900.00 |
| Production support: 3 × $60 | $180.00 |
| Subtotal | $1,080.00 |
| Illustrative user-entered tax | $54.00 |
| Total due | $1,134.00 |
9. Add useful notes without changing the agreement
Use the notes area for a short thank-you, project context, payment reference, included attachments or a factual reminder of an existing term. If you mention a late fee, interest charge, warranty or return rule, it should match the agreement and applicable local rules; adding new terms to the invoice does not prove the customer accepted them.
Keep the tone direct. “Please use INV-1042 as the transfer reference” is actionable. A long sales message, unrelated promotion or threat makes the payment request harder to scan. Link to supporting documents only when the recipient can access them securely.
10. Review, download and send the invoice
Read the preview from top to bottom. Check the seller and customer, invoice number, dates, purchase reference, descriptions, quantities, rates, adjustments, tax, total and payment instructions. Remove empty placeholders and make sure long text has not obscured another field.
Download the PDF and open the saved file before sending it through the channel agreed with the customer. Keep the sent copy and the source records together. The free maker downloads the PDF on your device; it does not send the invoice, track whether the customer viewed it or collect payment. Use the how to send an invoice guide for the delivery step.
How to write an invoice people can check
Write for the person approving the charge. Use the same project name, purchase reference and unit language that appeared in the quote or agreement. Replace broad labels such as “services” with a verifiable outcome, period or milestone, but do not invent detail that your records do not support.
Keep separate charges on separate lines when that helps review. Put the amount due and due date where they are easy to find. If a correction is needed after sending, preserve the audit trail and follow the appropriate replacement, credit-note or correction process instead of silently changing your saved copy.
- Specific: identify the service, product or milestone.
- Consistent: use the names, units and terms in the agreement.
- Checkable: show quantity, rate, dates or references when relevant.
- Bounded: do not claim delivery, payment or legal outcomes the document cannot prove.
How to fill out an invoice without missing a field
Work in a fixed order: seller, customer, number, dates, reference, line items, adjustments, total, payment instructions and final review. Keeping that sequence reduces the chance that you polish the layout before the underlying record is complete.
The UK government checklist covers identifiers, supply details, dates, amounts and seller/customer information; VAT invoices need additional details. Australia’s tax-invoice law sets information requirements tied to the transaction. Use the official guidance for your circumstances or obtain professional advice when unsure.
- Match names and references to the accepted quote, order or contract.
- Make every quantity × rate calculation reproducible.
- Distinguish subtotal, tax, credits and final amount due.
- Confirm the displayed due date agrees with the written term.
- Save the final PDF and the supporting records used to prepare it.